Planning a bathroom renovation can feel overwhelming, but when approached methodically, it becomes a rewarding project that adds value and comfort to your home. Whether you are updating an outdated space or reconfiguring for better functionality, each stage of the process has a clear purpose and sequence.
Understanding the main stages helps you manage costs, timelines, and expectations efficiently. A well-structured bathroom renovation integrates design, construction, and finishing details to achieve lasting quality.
Step 1: Define Your Goals and Budget
Before buying materials or hiring contractors, define what you want to achieve. Are you increasing storage, improving efficiency, or creating a spa-like retreat? Make a list of must-haves and nice-to-haves to guide spending decisions.
Set a realistic budget that includes materials, labor, permits, and a 10 to 15 percent contingency for unexpected issues such as plumbing or structural repairs.
Step 2: Plan the Layout and Design
Measure your bathroom carefully, noting the location of plumbing lines, electrical outlets, and ventilation. This information influences what changes are feasible without major structural work.
Design choices such as tile patterns, lighting, and cabinetry should align with the overall style of your home. For inspiration, explore reputable design sources like the National Kitchen and Bath Association, which offers layout standards and planning tips.
Step 3: Demolition and Preparation
Once your design is approved, demolition begins. Remove old fixtures, tiles, and flooring. Protect adjacent areas with plastic sheeting and use proper safety gear during demolition.
Inspect the subfloor, plumbing, and electrical systems before installing new materials. Address any leaks or outdated wiring now to prevent future problems.
Step 4: Rough-In Plumbing and Electrical Work
During the rough-in phase, licensed professionals adjust plumbing lines for sinks, showers, and toilets. Electricians install new outlets, switches, and lighting circuits according to your layout.
These systems must comply with local building codes. Always schedule inspections before closing walls to ensure safety and compliance.
Step 5: Install Walls, Flooring, and Waterproofing
After inspections, close the walls using moisture-resistant drywall or cement board. Apply a waterproof membrane in wet zones such as showers and tubs to prevent mold growth.
Choose durable, slip-resistant flooring like porcelain tile or luxury vinyl. Proper underlayment ensures longevity and prevents cracking or warping over time.
Step 6: Add Fixtures and Cabinetry
Install vanities, sinks, mirrors, and lighting fixtures in this stage. The placement of each element should support comfort and easy maintenance.
Cabinetry options range from custom-built units to prefabricated designs. Soft-close drawers and moisture-resistant finishes enhance durability in humid environments.
Step 7: Tile, Paint, and Finish Surfaces
Tile installation defines the bathroom’s aesthetic. Whether using ceramic, porcelain, or natural stone, maintain consistent grout lines and proper sealing.
For walls and ceilings, select paint designed for high-moisture areas. Neutral colors expand visual space, while accent walls add dimension and style.
Step 8: Install Fixtures and Final Touches
Plumbers connect faucets, showerheads, and toilets, ensuring watertight seals. Electricians complete light fixture installations and test all outlets.
Finally, add accessories such as towel bars, shelving, and mirrors. Small details, including matching hardware and coordinated finishes, bring the design together.
Step 9: Quality Inspection and Cleanup
Review all work carefully. Check for leaks, uneven grout, or paint imperfections. Make a punch list of remaining tasks before final payment to contractors.
Proper cleanup includes removing debris, polishing fixtures, and verifying that ventilation systems operate effectively to control humidity.
Step 10: Enjoy and Maintain Your New Bathroom
Once complete, your renovated bathroom offers improved comfort, efficiency, and style. Regular maintenance, such as resealing grout and cleaning ventilation fans, extends the lifespan of the renovation.
If you are planning other updates, such as kitchen remodeling, coordinate both projects to save time and reduce disruption.
How to Choose the Right Professionals
Hiring the right contractor determines the success of your renovation. Look for licensed professionals with verified references, insurance, and experience in bathroom projects.
Request detailed quotes that outline materials, labor, and timelines. Compare proposals based on quality, not just price, to ensure you receive long-term value.
When to Contact an Expert
Complex renovations involving plumbing, structural changes, or electrical upgrades should always be handled by qualified specialists. DIY efforts may seem cost-effective but can lead to expensive corrections later.
For personalized guidance and project estimates, Contact us to discuss your bathroom renovation goals with experienced professionals.
Common Challenges During Bathroom Renovations
Every renovation presents potential obstacles. Water damage, outdated wiring, or uneven flooring can slow progress. Planning for these challenges early reduces delays and cost overruns.
Maintain open communication with your contractor, monitor progress, and address issues promptly to keep the project on schedule.
FAQ: Bathroom Renovation Questions Answered
How long does a complete bathroom renovation take?
Most full bathroom renovations take three to six weeks, depending on complexity. Unexpected issues such as plumbing repairs can extend the timeline slightly.
What is the average cost of a full bathroom renovation?
Costs vary based on materials, labor, and location but typically range from $10,000 to $25,000. High-end finishes or layout changes can increase the total investment.
Can I live at home during the renovation?
Yes, but expect some disruption. Plan alternative bathing arrangements if your home has only one bathroom. Clear communication with your contractor helps schedule access times efficiently.
What design trends increase bathroom value?
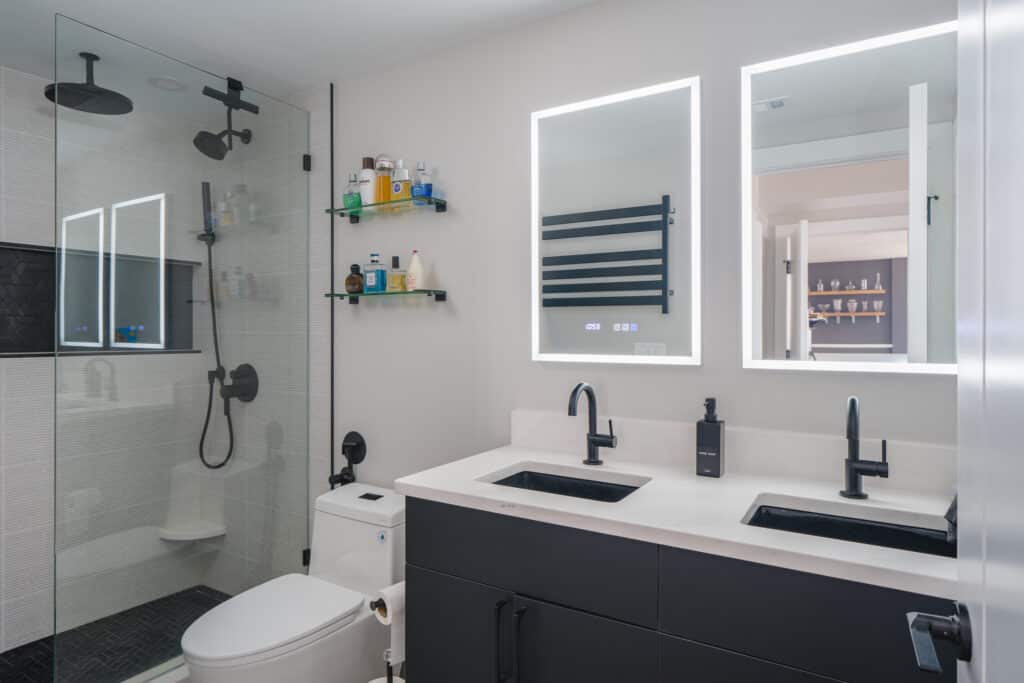
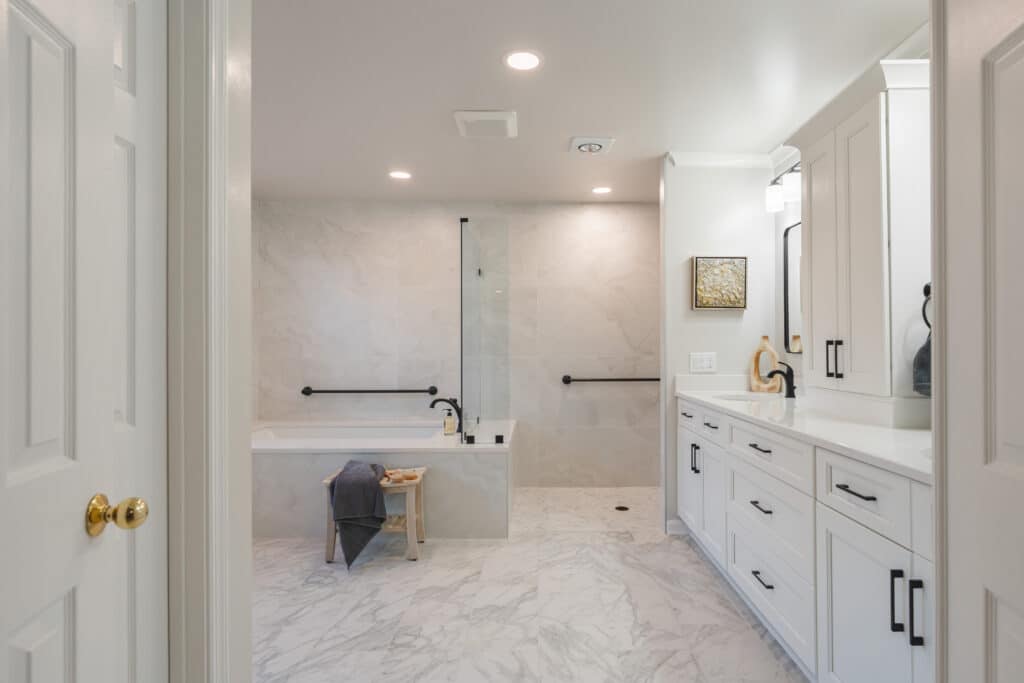
Walk-in showers, double vanities, and energy-efficient fixtures are popular upgrades. Using large-format tiles and minimal grout lines also enhances visual space and resale appeal.
How can I maintain my newly renovated bathroom?
Regular cleaning, proper ventilation, and sealing grout annually will preserve surfaces. Avoid harsh chemicals that damage finishes and inspect caulking periodically for wear.